Unified Clothing And Skin (Metal and Tessellate)
The Unified SkinClothing HighEnd shader is a shader used for adding depth and substance to your clothing and skin (metal and tessellate feature). This shader is best used on high end machines.
You can use the basic Unified SkinClothing shader if you have a PC with lower performance.
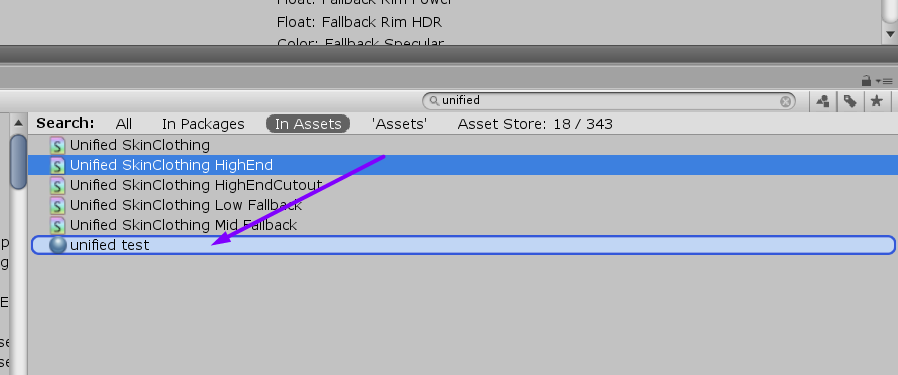
To use this shader on your clothing and skin items, search for "Unified" in your Unity project window. Create a new material by right clicking in the project window and select 'Create>Material'. Drag the Unified SkinClothing HighEnd shader on to the new material and this will add the shader to the material.
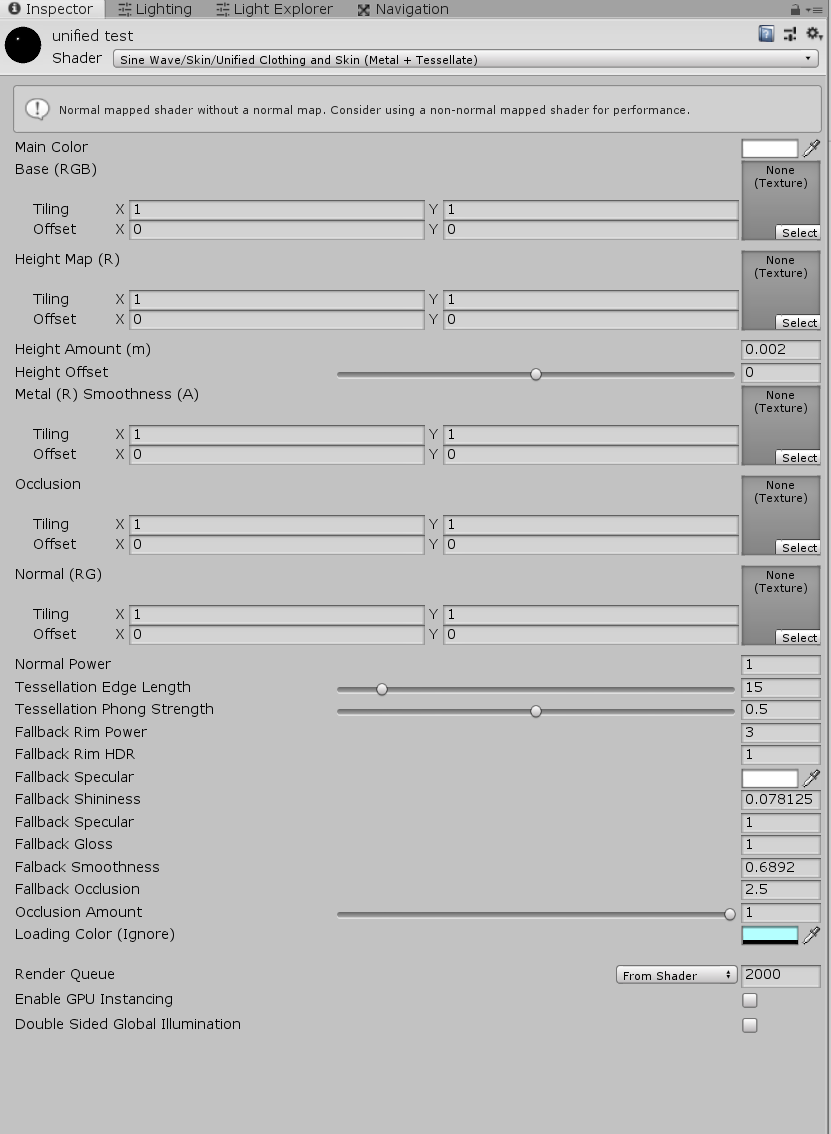
Now to work with the settings. NOTE: The name of the shader will now show as Unified Clothing And Skin (Metal and Tessellate)
- Main Color - Sets the overall color of the skin.
- Specular Color - Tints specular highlights of the skin.
- Shininess - Sets the shine amount of the skin.
- Rim Power - how rim lighting spreads around the edges of the model.
- Rim HDR - Adds a boost to rim lighting, to enable it push into HDR values (i.e. Brighter than white) for bloom.
- Normal Power - controls power of normal map (allowing them to be more/under represented)
- Tessellation - allows DX11 Tessellation which smooth's geometry when camera is up close.
- Specular Amount - Sets the specular amount.
- Gloss Amount - Sets how glossy the skin should look.
- Smoothness - controls specular highlights on PBR platforms (higher = tighter highlights), correlates with Standard shader.
- Occlusion - controls ambient occlusion.
- Loading color - For internal use. PLEASE IGNORE THIS SETTING.
But has the addition of a few more settings:
- Height Map:
- Single channel (R) texture with height distances encoded on it, you can use a heightmap exported from your 3D package (either Quixel/Substance Painter or from Maya/Max/Blender) - should be derived from the same thing building the normal maps.
Use the height map for encoding fine details (such as for example complex textured fabrics) that are too small or high poly to justify using actual geometry.
- Height:
- How much in meters to scale the model details by the heightmap. A value of 0.01 is 1cm. Typically you want 0.005 or so.
- Height Offset:
- This will subtract this value from the heightmap values uniformly; you can use for tweaking the visual appearance. Note: resulting values less than zero are treated as zero.
- Tessellation Edge Length:
- This defines the maximum size of a triangle on screen in pixels. If a triangle is larger than this many pixels on screen, it will be subdivided. Do not go below 15.
- Tessellation Phong Strength:
- This defines how "smooth" the surface should become, values larger than 0.2-0.3 will often create weird balloons. Typical values range from 0 (no smoothing corners/edges) to 0.1 (slight smoothing)
&#xNAN;NOTE: When using this shader, make sure to tick "Generate Lightmap UVs" and disable Mesh Compression on your model in the Unity Model Importer screen ( R ) = (R)

