Importing and Uploading Clothing
Overview
Importing and Uploading Clothing This is in the middle of an update.
Importing and Uploading Clothing
This is in the middle of an update. Please ask for any help needed. Discord fashion and clothing. https://discord.gg/sinespace
You can make clothing for your avatars in Sinespace by using any 3D software of your choice. You can use the avatars from the editor pack as a reference for your clothing; Just import it into your software and start making your clothing! Once your clothing is made, you can export the clothing as obj or fbx files, save it anywhere you want, and from there, you can setup your scene ready for importing your clothing item for upload.
Setting Up Your Unity Scene For Uploading
Make sure you put the same reference avatar (male or female) you used to make clothing into your scene, just in case you need it for resizing your item or any other changes.
Importing Your Clothing Item
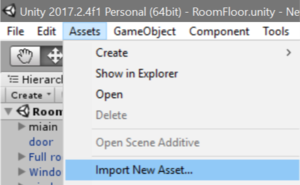
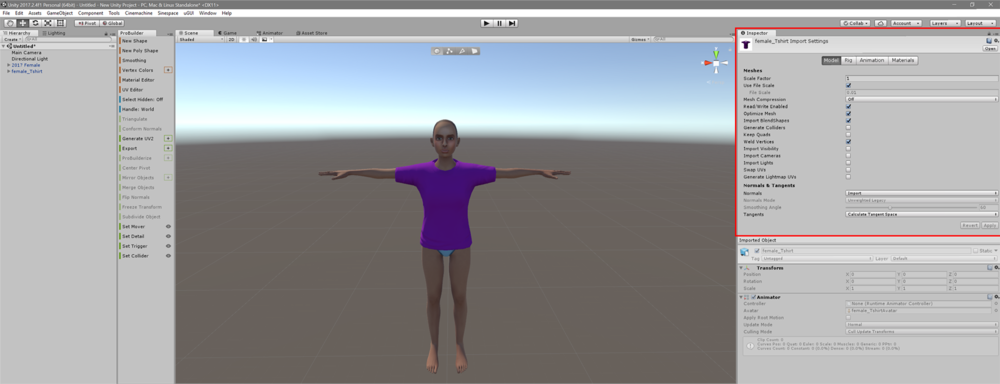
You will need to import your clothing item into the scene as well. First, go to Assets at the top of Unity, and then on the dropdown menu, choose Import Asset. This will open up your Explorer, and you can find your clothing item which you saved as an obj/fbx file. Once found, you can click on Import, and the item will be dropped into the main Assets folder. You can create a new folder and name it for organisation of your items.
Manually Rigged Clothing
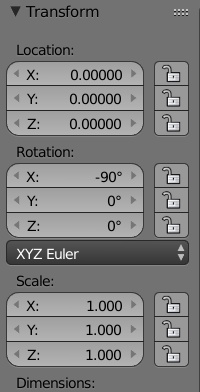
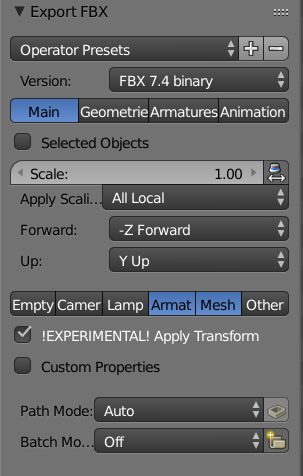
If you are importing manually rigged clothing, make sure your mesh is exported with a Location of <0.0,0.0,0.0> and Scale of <1.0, 1.0, 1.0> and Rotation of <-90,0,0>, and to tick "Experimental" and press apply transform in Export Settings.
Steps of Uploading
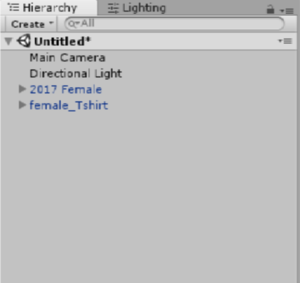
Open the folder you put your item in in Unity, and find the obj/fbx file. Drag this file into the Unity hierarchy. The Space avatar should be listed there too.
This should automatically fit your clothing to the avatar, but if it doesn’t, you might have to change the scale of the item under its Import Settings to 0.01. You can access the Import Settings by clicking the item in its Unity folder. If you used Blender to make the clothing, then the clothing should be the right scale already.
2. Click on the clothing item in the hierarchy, and under the Inspector window on the right hand side of the screen, click on Add Component and search for Clothing Item Settings and add it.
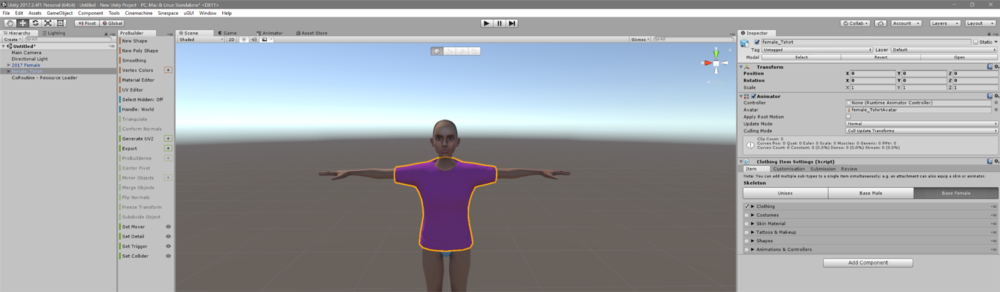
This will add Clothing Items Settings under the Inspector window. Please see the Clothing Item Setting page to see what each part of the clothing settings does.
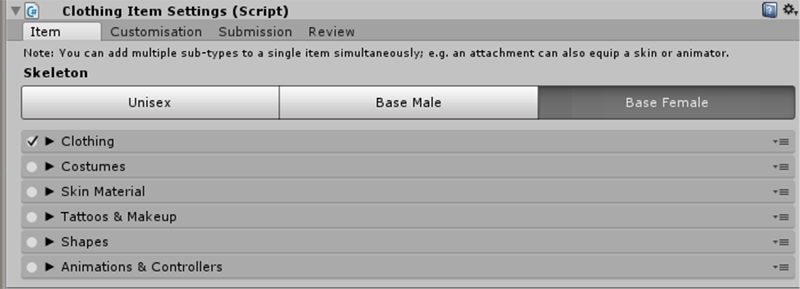
Skeleton Selection
The skeleton selection needs to be set to the same skeleton you used for making the clothing, so if you chose the female Space avatar, you will need to set this to Base Female, and if you used the male avatar, you will need to set this to Base Male.
Fitting and slots
You can choose the layer of your clothing here and also set the slots for the item. If you set the layer to 'Underwear' for example, this means other clothing with different layers can go over the top of your clothing. If you set the layer to 'Outwear', other clothing can go underneath it. For items like jeans and t-shirts, 'Close Fitting' is a good layer to set it to.
You will need to check the slots of the item. The avatar slots are where the skeleton will be deleted under the clothing. If you have a t-shirt for example, and don’t want it to be worn with other items, you will have to check the upper chest, chest and back slots
Skin and Cloth Deletion
This is where you can add deletion zones, preservation zones, recalculate bounds and also change the settings for deletion and tucking, fitting and obscuration tuning.
- Deletion Zone Settings - The deletion zones are used for selecting an area of the avatar which you want to be deleted under clothing. This can be used for certain types of clothing which need a little extra deletion underneath.
- Preservation Zone Settings - Preservation zones are used for selecting an area of the avatar which you want to keep under clothing. This is useful if you have clothing with holes in, e.g, a dress with a slit or a corset with a lace-up back.
Materials and patterns
You will need to check this option so the material on your clothing will be visible when you upload your item. Please leave this unchecked if you plan on adding pattern variations.
Level of Detail
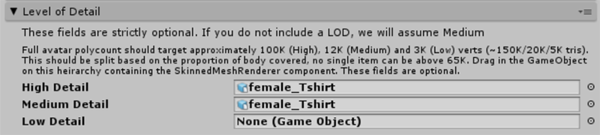
This setting is optional. If you want to include high, medium and low detail you can do so here by dragging in the game object containing the SkinnedMeshRender component. If you do not want to include these, the default LOD for your clothing item will be medium.
Automatic Skin Weighting
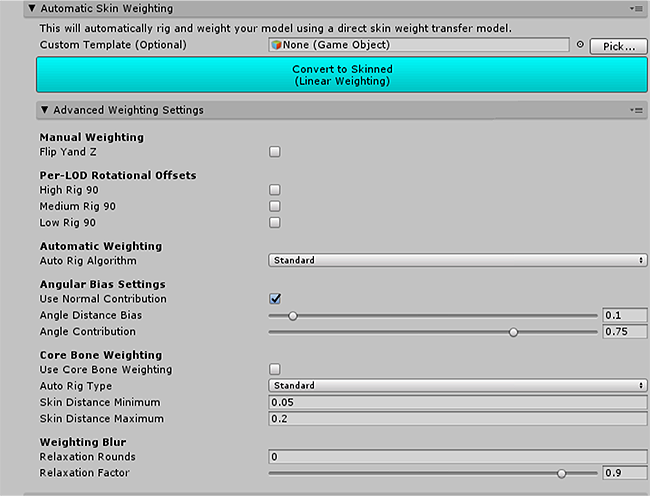
When you have hit 'Prepare' on your clothing item, you can come back to this setting and re-weight the item or change the advanced weighting settings.
Feet Settings
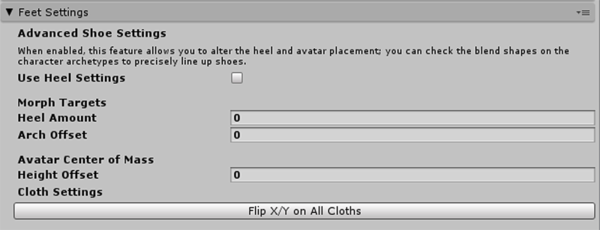
You only need to use this setting if you are uploading high heels and need to adjust the heel height and avatar placement.
Clothing Settings - Customisation tab
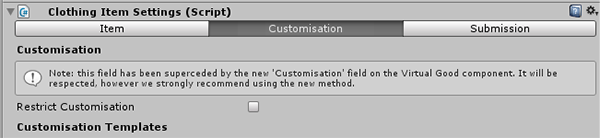
Here you can restrict other users from customizing your items.
Preparing the Clothing
To prepare the clothing, all you need to do is click the big blue prepare button to get the clothing ready to upload. This will add all of the weighting settings and all of your other settings.

Making the Prefab
A prefab of your item is needed for uploading. To make a prefab, simply drag your item from the hierarchy into the project folder.

Setting up the Prefab for Upload
The prefab will be selected already from dragging and dropping into the project window. With it selected, you will see it has all the same information under the Inspector window as the original obj/fbx file. Underneath the clothing item setting component, you will see another Add Component button. Click on it, and search for Virtual Good and add it. Adding the Virtual Good will allow you to set your clothing item as a salable good in Sinespace.
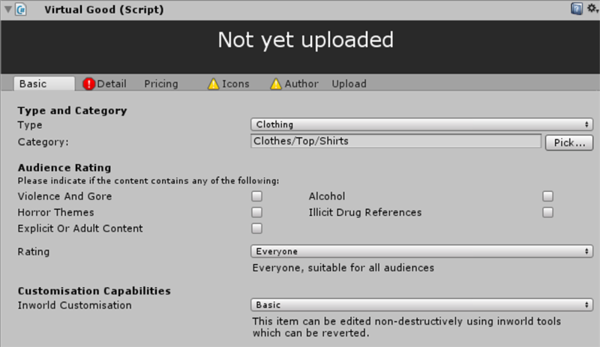
Virtual Good Settings
Once you have added the virtual good component, you can go to our Virtual Goods page to see how this component works. This is used to upload your item to Sinespace.
For clothing, under the Basic tab of the virtual good component, set the Type to Clothing, then choose the appropriate category. The rest of the virtual good component you can fill out how you want to.
To check on your items' upload progress, go to our curator site.
Video/Basic Clothes
This tutorial shows you how to set up clothing and import clothing into Space.