Regions
Overview
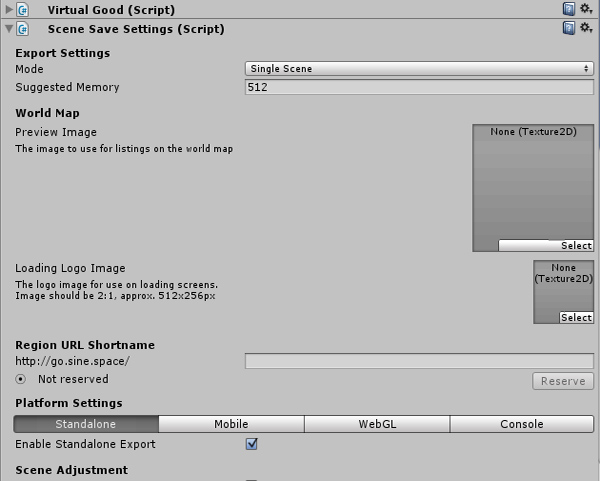
There are different ways to build regions in Space. You can build region assets in other software packages and import them into Unity, you can use Unity's mesh shapes and terrain tools, and you can grab third-party assets from the Unity Asset Store. All of the pages linked here refer to the Scene Export Settings / Scene Save Settings component.

If you want to upload a region quickly, click File > New Sinespace Scene in Unity to instantly create a quick-start region.
Assemble your scene
You can upload any scene you create in Unity as a region in Space. Once your scene is assembled you have two housekeeping tasks.
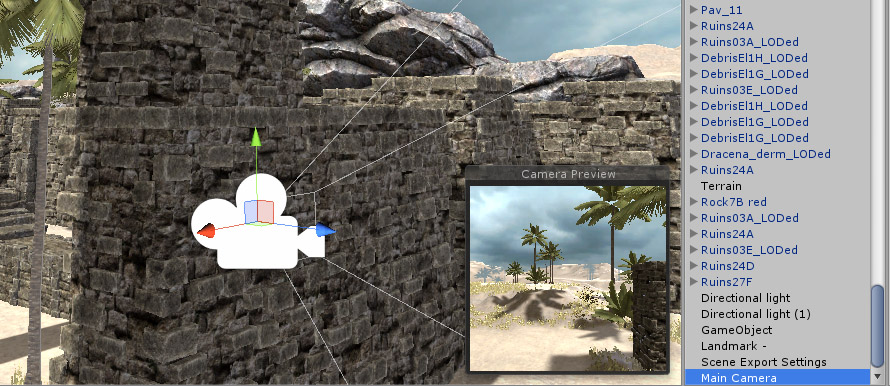
Remove the main camera
When you create a new scene in Unity it will by default have a light and a camera. You need to delete the camera by selecting it in the Hierarchy window and pressing delete.
Add a landing zone
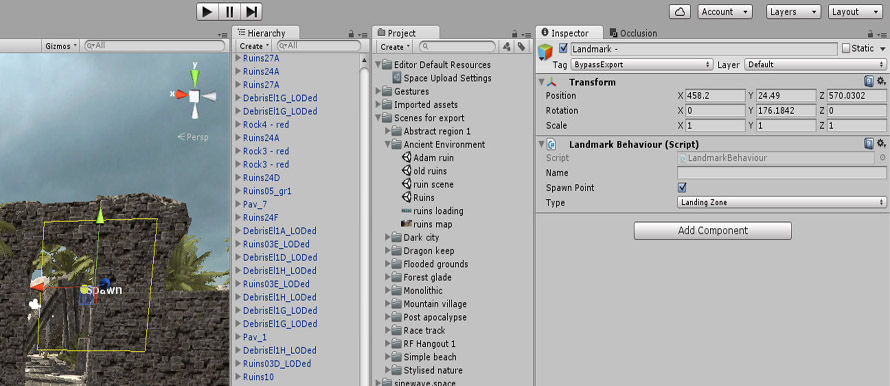
You need to define where users arrive when they log in to your region, and what direction they are facing. To do this, once your scene is set up, select Game Object > Create Other > Landmark from the top menu in Unity.
If your Scene Hierarchy menu does not include Create Other > Landmark, create an empty object, then in the Inspector add a Landmark Behaviour component.
This places a new landmark item in your scene. In the Inspector window, set the type to Landing Zone and tick Spawn Point. The in-scene object is a yellow-edged transparent plane which you can position anywhere in your scene. The yellow arrow points in the direction your visitors will face when they arrive. Be careful to position the landing zone slightly above the terrain; if a tall avatar's feet arrive below the terrain they may fall through.
Add a new scene to your region
This does not apply if you are using Multi-Scene Mode & Multi-Scene Editing. You can have more than one scene in your region.
- Create a new scene in your current Sinespace project.
- Double-click the new scene in your Assets to load it into the Hierarchy.
- Design your scene, and be sure to save it.
- When ready to upload to the server, click Space > Scene Settings.
- Fill out the needed information and map pictures, then click Automatic Submission.
To teleport from one scene to another, see Teleport World.
Create a home region or template
If you want to make your region a home type, which could be edited by the users themselves, you need to attach a component called Room Floor to one of the items in the scene — usually the terrain or the object used as a field. With at least one Room Floor component, the region will show an Edit Room button when you are in it. You can add several Room Floor components to different objects; each floor can be shared with another user, giving them the authority to edit it.
In your inventory, you will also find an item with the same name as the region. This is a home template. You can use it in the Edit Room > Design function to change the whole set of a region. You can also set a price for it when you upload, so other users can buy it in the shop.
For more advanced settings, see the post zones page and the lighting an interior page. You can also see how Navigation Bake works, and we have information on Occlusion Bake and culling. There are also some handy lighting tips.